Portals
When multiple layers are available, you can explore and compare them using a portal. Two portal types are available in ENVI:
- View Portal: Uses the full view. You can open one View Portal per view.
- Standard Portal: A subset of the view that you can move and resize within the view. You can create multiple Standard Portals per view.
When you create a new portal, it is added to the top of the Layer Manager and becomes the selected layer. The portal icon ![]() appears next to the layer name, as follows:
appears next to the layer name, as follows:

Three animation methods enable alternating between the display layer and the portal layer.
- Blend transitions between layers by increasing the transparency of display layer.
- Flicker toggles between the layers.
- Swipe passes a vertical divider back and forth to alternate between layers.
When animation begins, the portal layer displays first, then transitions to the display layer.
Add a View Portal
Click the View Blend![]() , View Flicker
, View Flicker ![]() , or View Swipe
, or View Swipe ![]() button on the toolbar to create a View Portal that performs the selected animation. (You can also select these options from the Display menu.) ENVI uses the first non-portal layer in the Layer Manager for the display layer, and the second layer as the source in the View Portal. The new layer name is View Blend, View Flicker, or View Swipe, depending on the animation method you selected.
button on the toolbar to create a View Portal that performs the selected animation. (You can also select these options from the Display menu.) ENVI uses the first non-portal layer in the Layer Manager for the display layer, and the second layer as the source in the View Portal. The new layer name is View Blend, View Flicker, or View Swipe, depending on the animation method you selected.
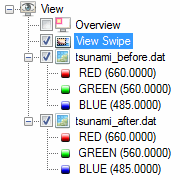
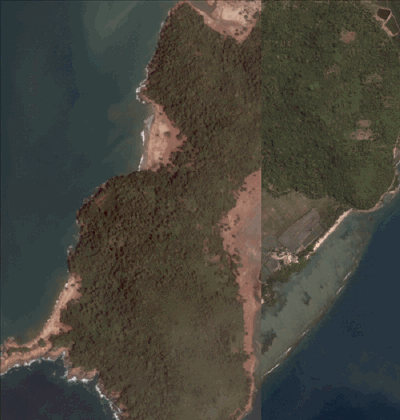
The following shows a View Portal with View Swipe animation enabled:

- Make the View Portal toolbar visible by hovering the cursor over the top of the view. This toolbar provides the following options to control the animation:
- Click the Pause
 button to pause the selected animation.
 - Click the Play
 button to restart paused animation.
 - Click the Faster
 or Slower
  buttons repeatedly to control the speed of the animation.
 - To change the type of animation, click a different animation button on the main toolbar, or right-click the Image window view and choose from the menu that appears.
- To load a different layer in the portal when more than two layers are available, right-click the Image window view and select Load New Layer > layer name.
- To visually compare layers to each other and to the display layer, see Comparing Multiple Layers Using Portals.
- To stop the animation and close the View Portal, click the button of the current animation on the main toolbar, or right-click the Image window view and choose from the menu that appears. Closing the portal removes it from the Layer Manager.
Add a Standard Portal
Click the Portal ![]() button on the toolbar to use the first non-portal layer in the Layer Manager as the display layer, and the second layer as the source in the Standard Portal. Or, to open a Standard Portal with a different layer as the source, right-click the desired layer in the Layer Manager, then select Display in Portal. The new layer name includes the name of the source layer, preceded by a
button on the toolbar to use the first non-portal layer in the Layer Manager as the display layer, and the second layer as the source in the Standard Portal. Or, to open a Standard Portal with a different layer as the source, right-click the desired layer in the Layer Manager, then select Display in Portal. The new layer name includes the name of the source layer, preceded by a [p].
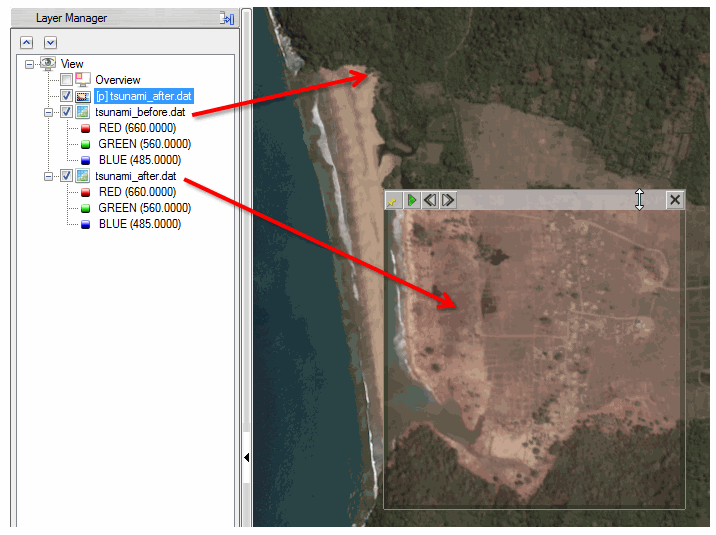
The following shows a Standard Portal:

- To start animation in the Standard Portal, right-click on the portal and select Blend, Flicker, or Swipe. To stop the animation, right-click the portal again and select the current animation to toggle the option off.
- Make the Standard Portal toolbar visible by hovering the cursor over the top of the portal. This toolbar provides the following options to control the animation and the position of the portal:
- Click the Pause
 button to pause the selected animation.
 - Click the Play
 button to restart paused animation.
 - Click the Faster
 or Slower
  buttons repeatedly to control the speed of blend, flicker, or swipe.
 - You can Pin
 the Standard Portal to the display layer so that when you pan or fly, the portal moves with the layer. If you Unpin
  the Standard Portal, it remains in the same position in the Image window view as you pan and fly.
 - To resize the Standard Portal, click and drag its border, or right-click in the Standard Portal and select Resize Portal to choose from pre-set options.
- To move the Standard Portal to a different location, click and drag.
- To load a different layer in the portal when more than two layers are available, right-click the portal and select Load New Layer > layer name.
- To visually compare layers to each other and to the display layer, see Comparing Multiple Layers Using Portals.
- If you have multiple Standard Portals open in an Image window view, you can reorder them by using drag-and-drop in the Layer Manager tree, or by right-clicking in the Layer Manager and selecting Order.
- To hide or show the color border on the Standard Portal, right-click the Standard Portal and select Show Border to toggle it off or on.
- To close the Standard Portal, right-click it and select Close Portal. Or, click the Close button on the Standard Portal toolbar. Closing the portal removes it from the Layer Manager.
Comparing Multiple Layers Using Portals
By default, when you select one of the Portal buttons from the toolbar, ENVI uses the first non-portal layer in the Layer Manager as the display layer, and the second layer as the source in the View Portal or Standard Portal. If you have more than two layers available and wish to compare the images to each other as well as the display image, see the scenarios below that use the View Portal as an example .
For example, your layers in the Layer Manager ordered as follows:
data1.dat
data2.dat
data3.dat
- To automate between
data1.datanddata2.dat: show all layers and start a View Portal. - To automate between
data2.datanddata3.dat: hidedata1.datanddata2.datlayers and start a View Portal. Or, start a View Portal and hidedata1.datanddata2.datlayers. - To automate between
data1.datanddata3.dat: start a View Portal with all layers, then use Load New Layer to change the source for the portal layer todata3.dat.